Loads from YouTube (Google) when you press Play
Segment Mesh splits a mesh into two parts by a boundary that passes through two points you place. The boundary does not cut straight through the model: it runs around the surface and follows its relief. This makes the tool good for separating a feature that sticks out of the model, such as a nose or an ear on a bust, a tooth on a dental arch, or a boss on a machined part.
To open it, select a mesh and click Mesh Edit › Segment Mesh.

The Segment Mesh panel opens.
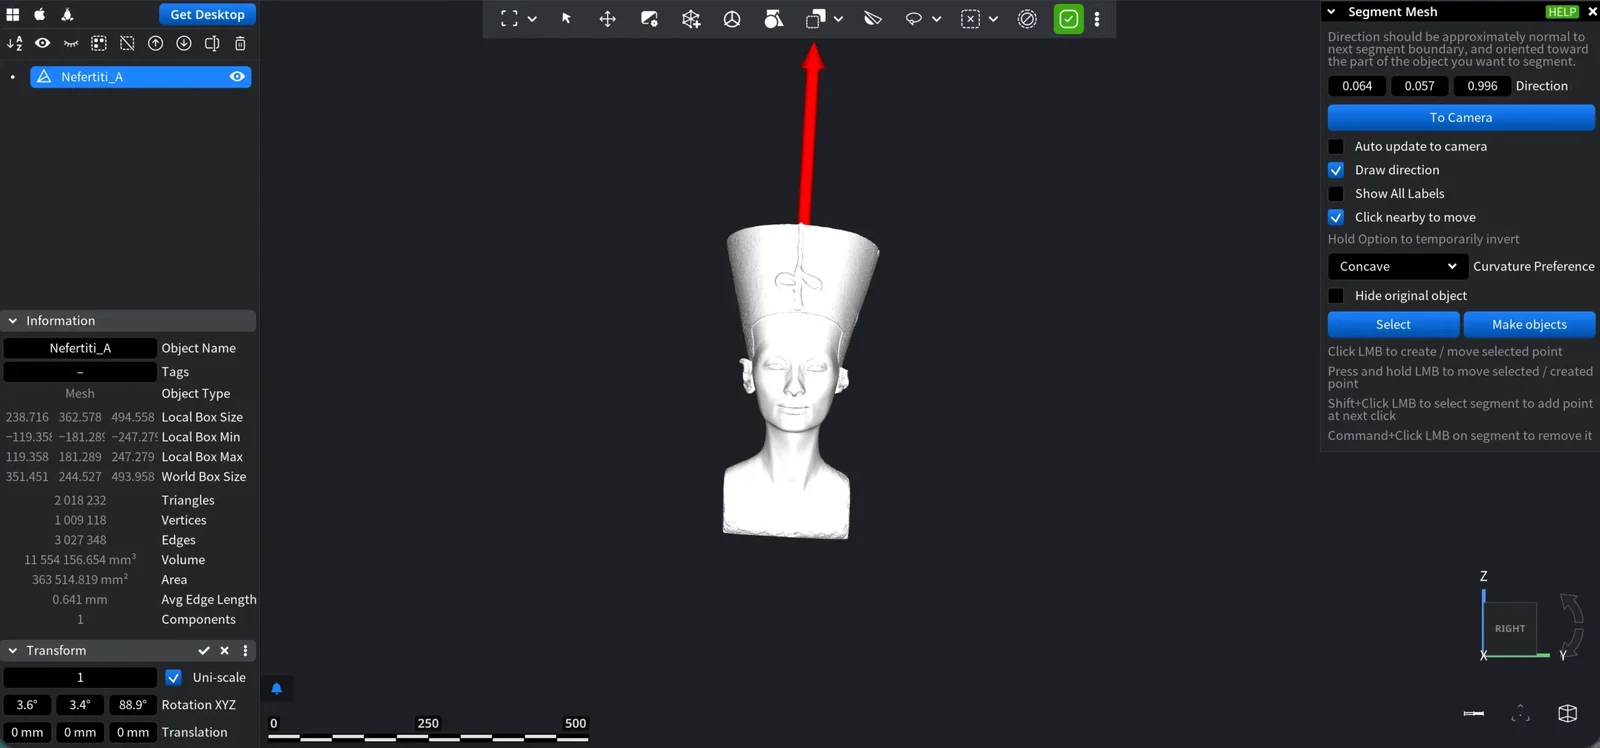
Set the direction
The boundary is guided by a direction vector. As the panel says, the direction should be approximately normal to the next segment boundary and point toward the part of the object you want to separate. The easiest way to set it is to turn the camera so that you look at the feature, and click To Camera.
| Setting | What it does | Default |
|---|---|---|
| Direction | The X, Y and Z components of the direction vector | — |
| To Camera | Points the direction vector to the current camera position | — |
| Auto update to camera | Keeps pointing the direction vector to the camera while you turn the view | Off |
| Draw direction | Shows the direction vector in the viewport | On |
| Show All Labels | Shows labels for all points of all segments. When it is off, labels are shown only for new segments and the segment you edit | Off |
| Click nearby to move | Lets you drag a selected point after clicking near it, not exactly on it. Hold Alt (Option on macOS) to invert this setting for a moment | On |
| Curvature Preference | How the boundary chooses its way between the two points, see below | Concave |
Curvature Preference has three modes:
- Geodesic chooses the shortest boundary.
- Convex chooses a longer boundary that goes through convex regions.
- Concave chooses a longer boundary that goes through concave regions, such as the crease where a feature meets the rest of the surface.
Place the points
The mouse hints are at the bottom of the panel:
- Click with the left mouse button to create a point or to move the selected point.
- Press and hold the left mouse button to drag the selected or new point.
- Shift + click a segment to select it; the next click adds a point to it.
- Ctrl + click a segment to remove it (Cmd + click on macOS).
Two points make one segment. To separate several features, place two more points for each of them.
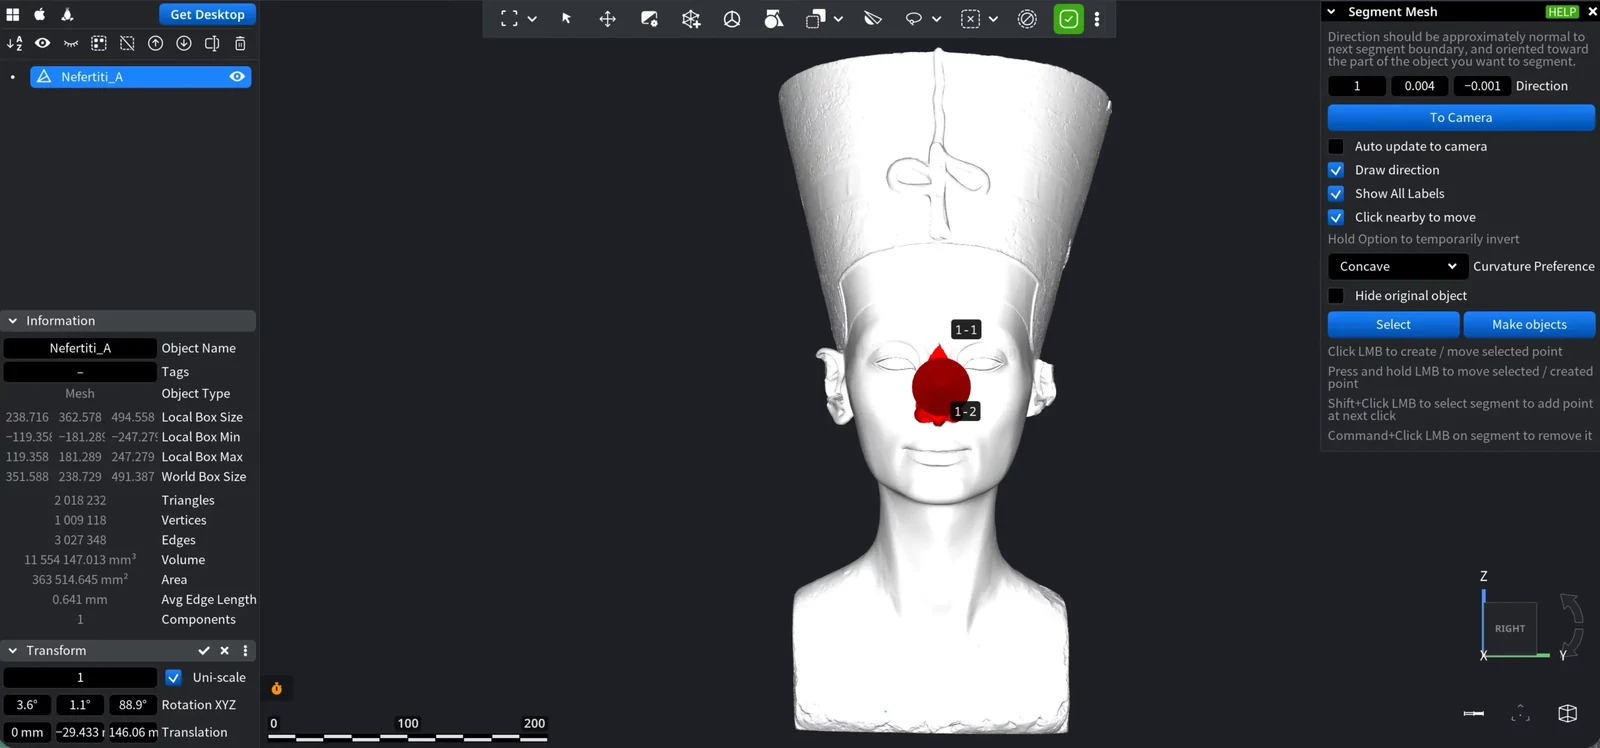
In the example below, we separate the nose of a Nefertiti bust:
- We turned the camera to look at the face and clicked To Camera.
- We placed two points, 1-1 and 1-2, at both sides of the nose.
- We left Curvature Preference at Concave, so the boundary goes around the nose along the concave fold of the face.
Get the result
- Select turns the segments into a selection of triangles on the mesh.
- Make objects turns the segments into separate objects in the scene.
- Hide original object hides the original mesh, so you can see the other objects of the scene, for example the new segment objects.
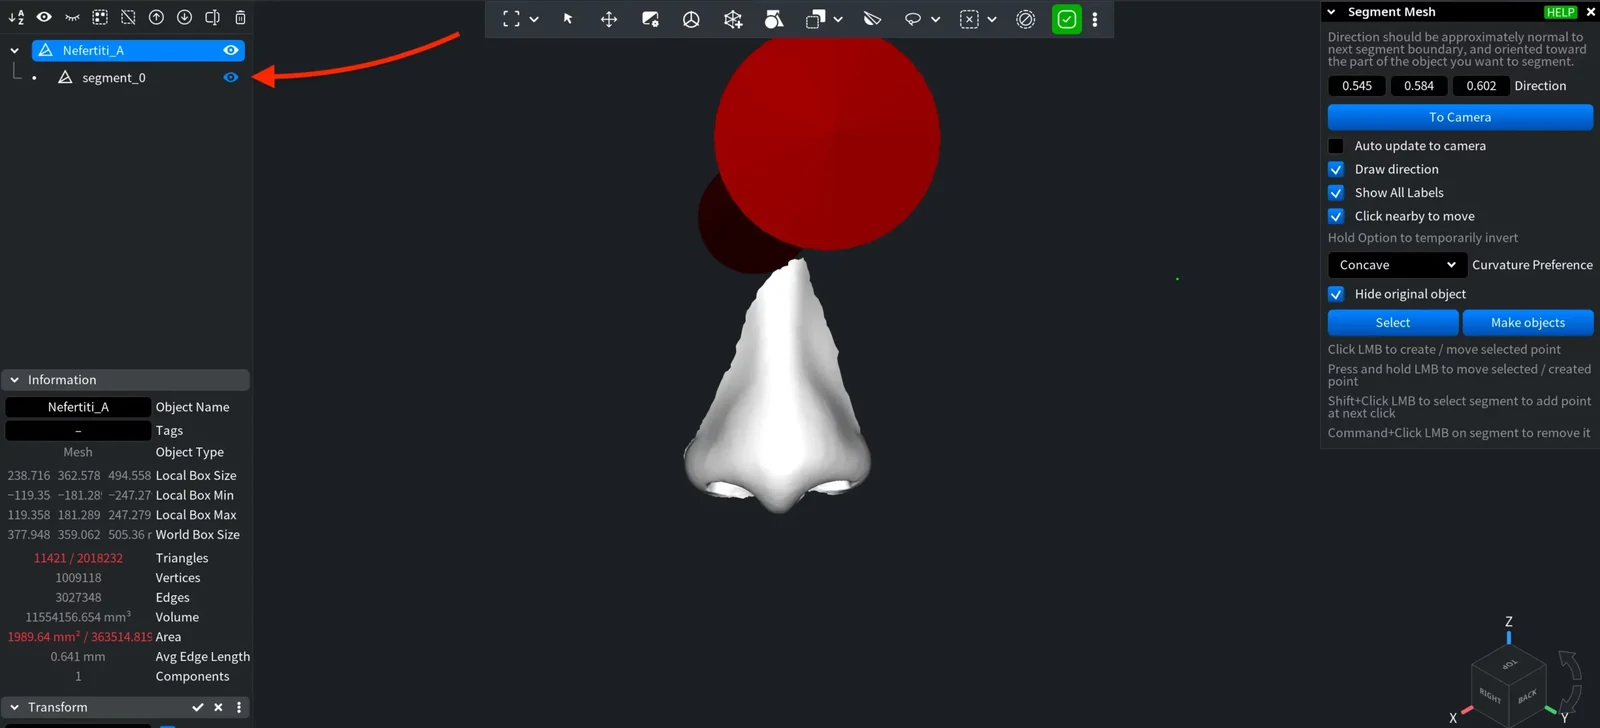
In our example, we turned on Hide original object and clicked Select and Make objects. The nose became a separate mesh object.
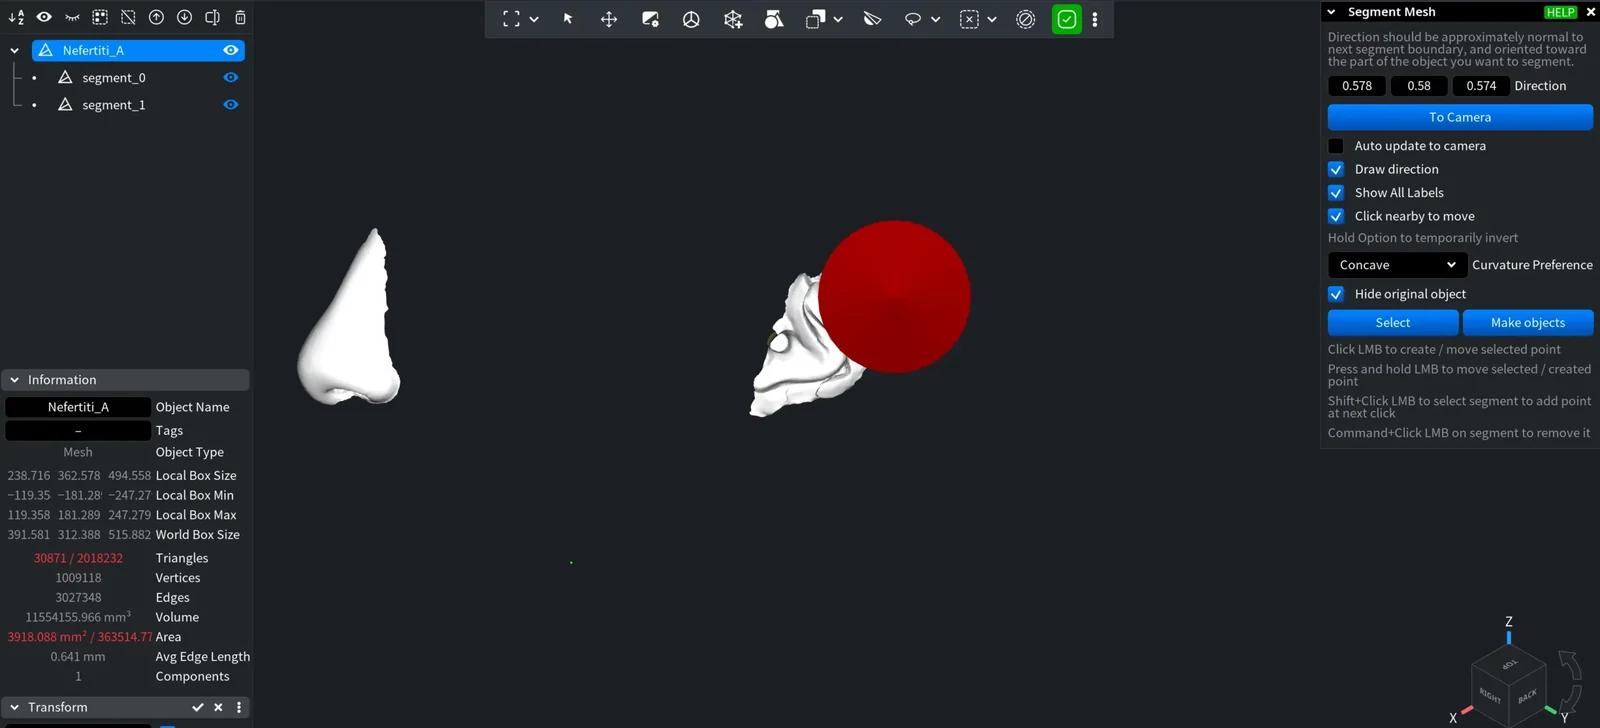
You can make as many segments as you need. In the next screenshot, we separated the nose and one ear with points 1-1, 1-2 and 2-1, 2-2.
After Select, you can work with the selected triangles as with any selection: for example, make a separate object from them with Selection to Object.
Other tools split a mesh in different ways. Select Region finds a region from a few triangles you mark inside and outside it. Mesh Cut & Measure cuts along a path that you draw point by point. The Section tool cuts with a plane, see how to slice a mesh for 3D printing.


