
Text on Mesh puts text right onto the surface of a mesh: raised above it or engraved into it. Use it to mark a part with a serial number, a name or a date before 3D printing.
To create text as a separate object that is not tied to a surface, use Create Text.
You find the tool in Mesh Edit › Text on Mesh.

Add Text Step by Step
-
In the Scene tree, select one mesh.
-
Go to Mesh Edit › Text on Mesh. The Text on Mesh panel opens.
-
Click two points on the surface: the first one sets where the text starts, the second one sets its direction. To adjust the direction, drag the points.
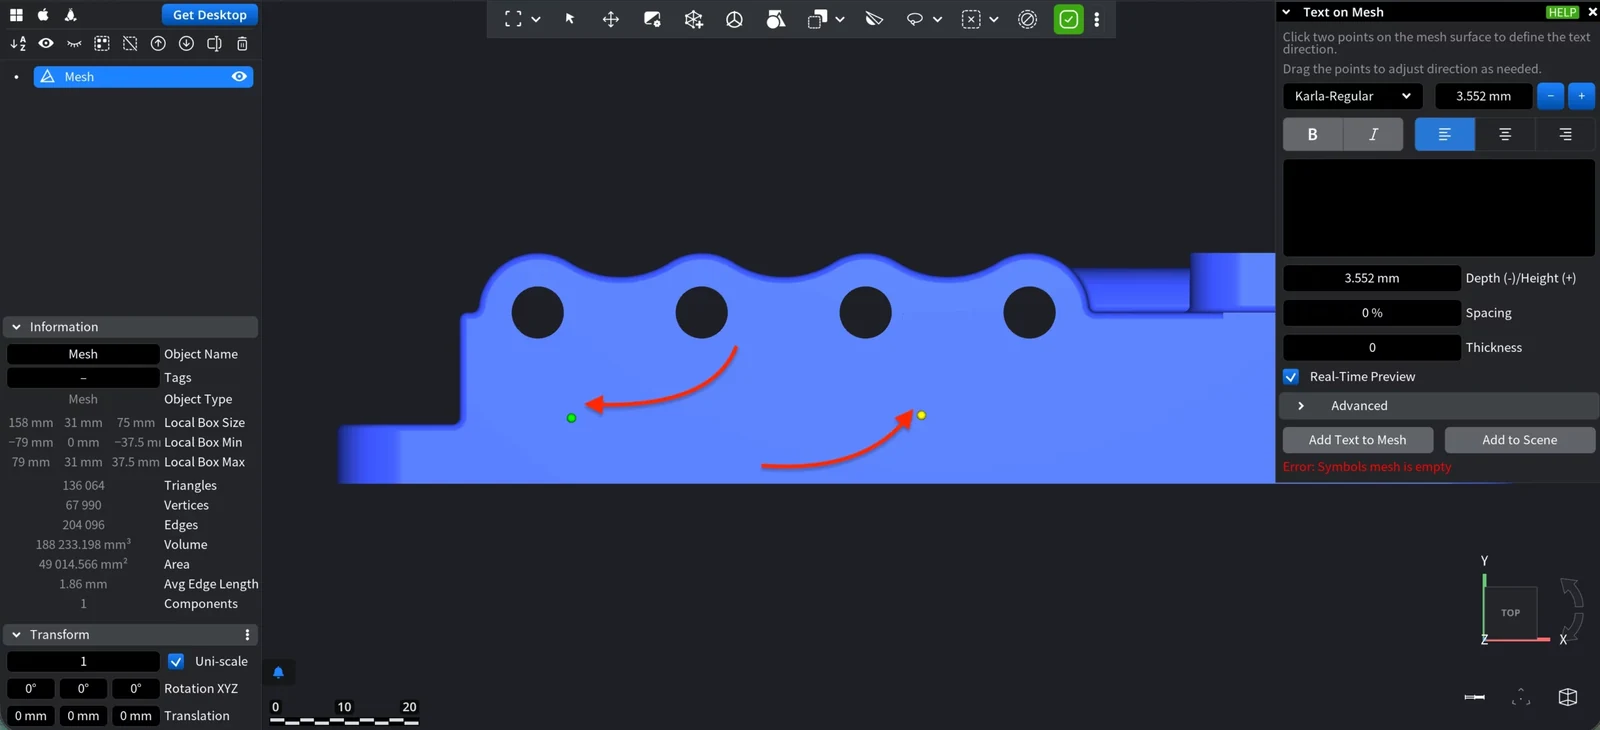
-
Type the text and set the font, the size and the other settings (see the tables below). With Real-Time Preview on, the model shows the result as you change the settings.
-
Choose a sign for Depth (-)/Height (+): a positive value raises the text above the surface, a negative value engraves it.
-
Click Add Text to Mesh to make the text part of the mesh, or Add to Scene to add it as a separate object. The panel closes.
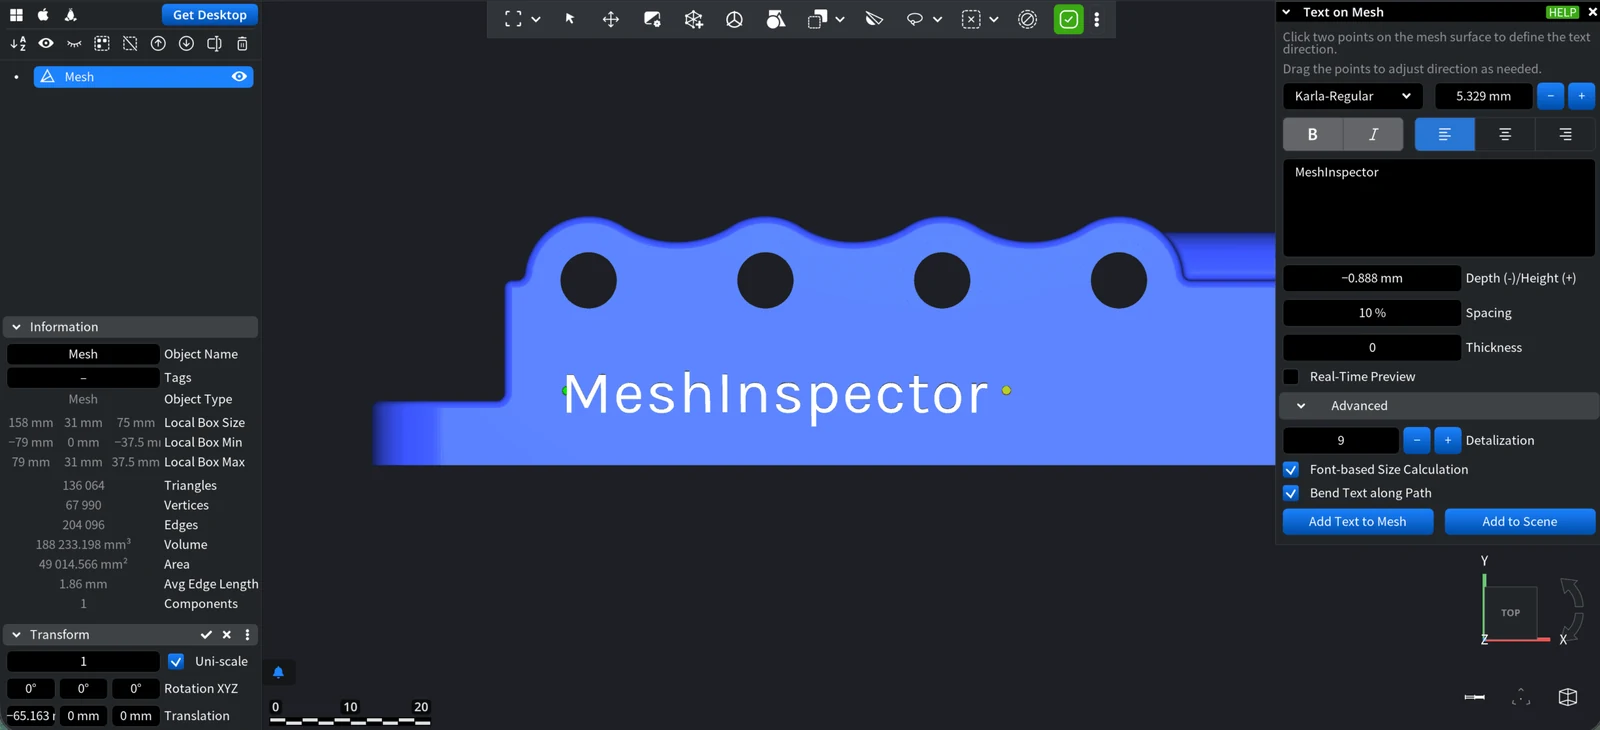
To take the text back, press Ctrl+Z (Cmd+Z on macOS).
Text Settings
Default sizes depend on the size of the model: they are set from the diagonal of its bounding box.
| Setting | What it does | Default |
|---|---|---|
| Font list | The fonts installed on your computer plus six built-in fonts: Karla-Regular, Cousine-Regular, DroidSans, ProggyClean, ProggyTiny, Roboto-Medium. | |
| Font size | The field next to the font list: the height of the letters. From 1/100 to 1/10 of the model diagonal. | 1/50 of the model diagonal |
| Bold, Italic | Switch to the bold or italic style of the font. Available when the chosen font has that style. | |
| Left, Center, Right | With Bend Text along Path on, where the text sits on the path between the two points: Left starts it at the first point, Center puts its middle halfway, Right ends it at the second point. With several lines, it also aligns the lines. | Left |
| Text field | The text to place. It can have several lines. | |
| Depth (-)/Height (+) | How far the text goes into the surface (negative) or rises above it (positive), up to 1/10 of the model diagonal. | 1/50 of the model diagonal |
| Spacing | Extra space between the letters. | 0 |
| Thickness | Makes the strokes of the letters thicker. | 0 |
| Real-Time Preview | Updates the preview on the model each time you change a setting. On a heavy model this can make the app pause. | On |
Advanced Settings
| Setting | What it does | Default |
|---|---|---|
| Detalization | How finely the curves of the letters are approximated, from 2 to 15. Higher values give smoother letters and more triangles. | 2 |
| Font-based Size Calculation | On: the size of each letter is calculated from the font height. Off: from the bounding box of the text. | Off |
| Bend Text along Path | The text follows the surface along the path between the two points. When it is off, the panel also shows Maximum movement and Use Custom Normal (with a Custom Normal vector). | On |
How the Text Joins the Mesh
There is no separate choice of operation: the sign of Depth (-)/Height (+) decides it.
- Add Text to Mesh with a positive value joins the text to the mesh (a Union), so the letters stand out.
- Add Text to Mesh with a negative value subtracts the text from the mesh (a Difference), so the letters are engraved.
- With Depth (-)/Height (+) at 0 the tool shows the error Too small offset.
- After Add Text to Mesh, the mesh loses its texture and its vertex and triangle colors, and flat shading is turned on.
- Add to Scene leaves the mesh unchanged and adds the letters as a new object named Text object. You can join it later with Mesh Boolean.
Tips
- Place text on a flat or gently curved area. On a strongly curved or ragged surface the path between the two points can fail; the panel then shows an error, for example No path between control points.
- For engraving, keep the depth well below the wall thickness of the part, so the letters do not cut through.


