

Select Creases by Angle finds the sharp edges of a mesh: the edges where the two neighboring triangles meet at a large angle, such as the outer edges and grooves of a CAD part. It marks them either as selected edges or as creases. This guide also covers Swap Creases / Edges, which turns selected edges into creases and creases into selected edges.
Find sharp edges
- Select a mesh in the Scene tree.
- Click Select › Select Creases by Angle. The panel opens, and the edges sharper than the current angle are marked at once.
- Set the angle in Deviation from plane at edge. An edge is marked when its two triangles deviate from a common plane by more than this angle.
- In Show as, choose Selected edges or Crease edges.
- Close the panel. The result of the chosen Show as option stays on the mesh.
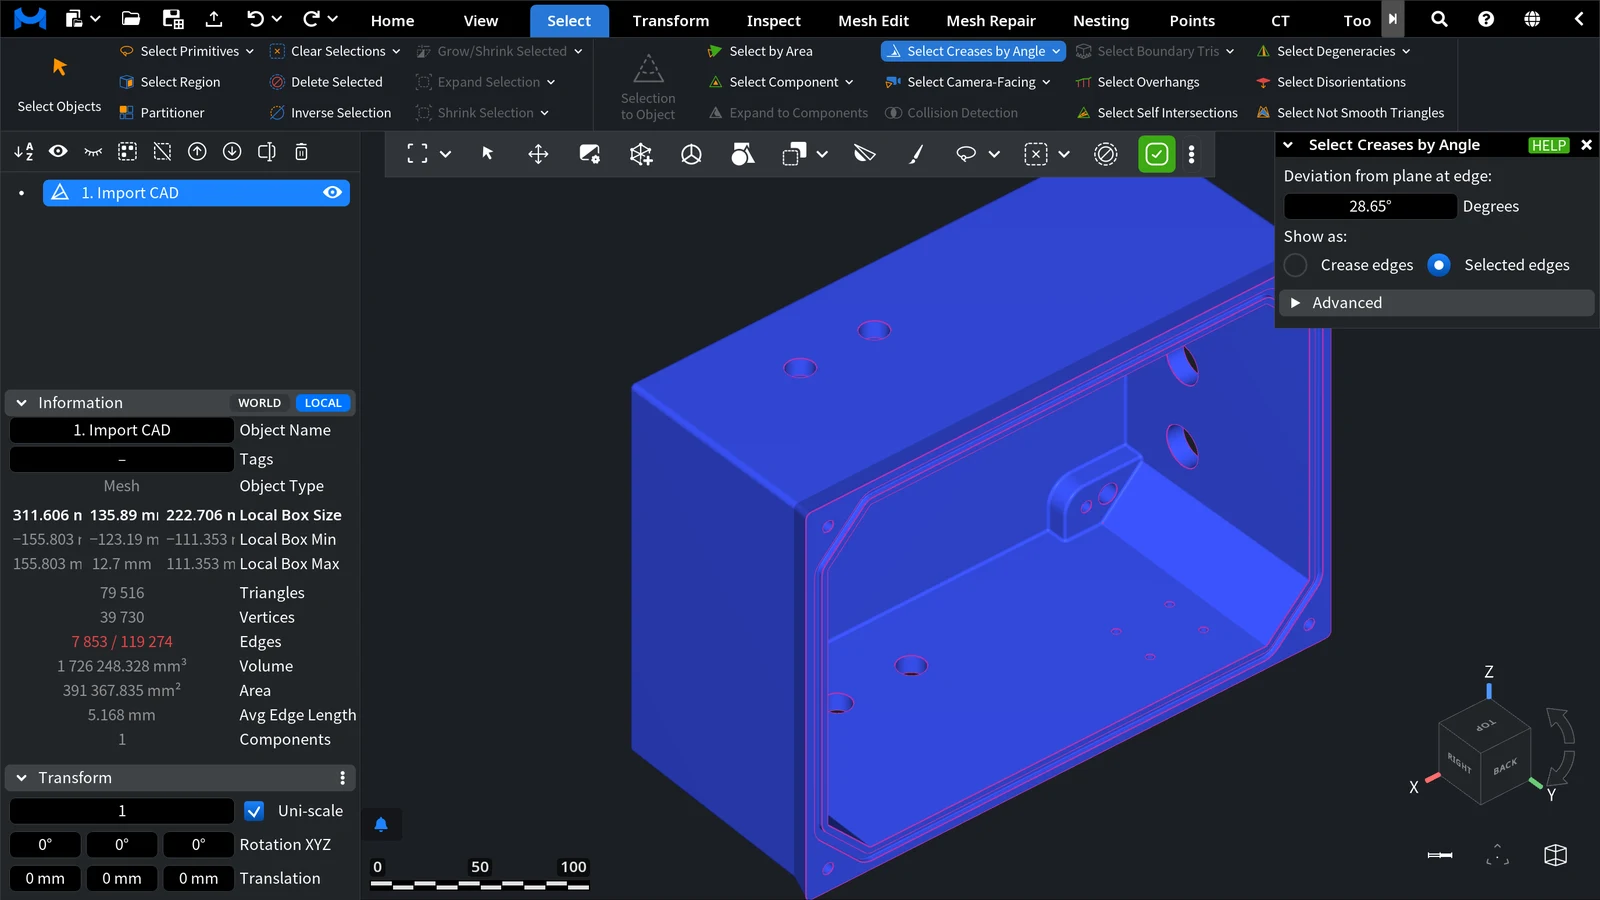
The default angle is 28.65°. A lower angle also marks softer edges and, on a scan, noise; a higher angle keeps only the sharpest edges. The result updates as soon as you change the angle or the Show as option.
| Show as | What it does |
|---|---|
| Selected edges (default) | Selects the sharp edges. It does not affect light and shades |
| Crease edges | Marks the sharp edges as creases: light and shades are not interpolated across them, which is visible only when flat shading is off |
Advanced settings
Open Advanced to remove short, scattered pieces from the result, for example on a noisy scan. The filters are applied only when you click Update Creases.
| Setting | What it does | Default |
|---|---|---|
| Critical Length | The length used by both filters | 1/64 of the bounding box diagonal |
| Iterations | How many times the filters are applied, from 1 to 5 | 1 |
| Filter components | Removes connected groups of marked edges whose total length is less than Critical Length | On |
| Filter branches | Removes branches shorter than Critical Length | Off |
| Update Creases | Recomputes the marked edges with the current settings |
What to do with the edges
Selected edges are borders for other tools:
- Expand to Components grows a triangle selection up to the selected edges, for example to select one face of a CAD part.
- Select Incident Triangles selects the triangles along the edges.
- To add or remove edges by hand, use Edge Selector.
Creases are kept by tools that change the mesh: Remesh does not flip crease edges and selected edges, so sharp edges stay in place, and Reduce Noise does not move the vertices of crease edges.
Swap Creases / Edges
Swap Creases / Edges turns the selected edges of a mesh into creases and its creases into selected edges, in one click. Use it, for example, to mark edges you selected by hand as creases, or to get the creases as selected edges and use them as borders.
- Select one mesh in the Scene tree.
- Click the arrow next to Select › Select Creases by Angle and choose Swap Creases / Edges.
The command works at once, without a panel. It is unavailable when the mesh has neither selected edges nor creases, or when they are the same edges; the tooltip then says ObjectMesh doesn't have unique selected edges or creases. To swap back, run it again or use Undo (Ctrl+Z, or Cmd+Z on macOS).


